
Audio-Reactive Logo
Turn a bitmap or SVG logo into a music-reactive laser animation using Split to Paths and per-path audio mappings in Animation Studio.
A logo that breathes, pulses, and shimmers with the music is a signature laser-show moment. The key feature is Split to Paths — breaking the logo into its component paths so each part reacts differently.
What You'll Build
A multi-part logo where, for example, the outline pulses with the bass while the lettering shimmers with the highs — exported as one self-contained .ild.
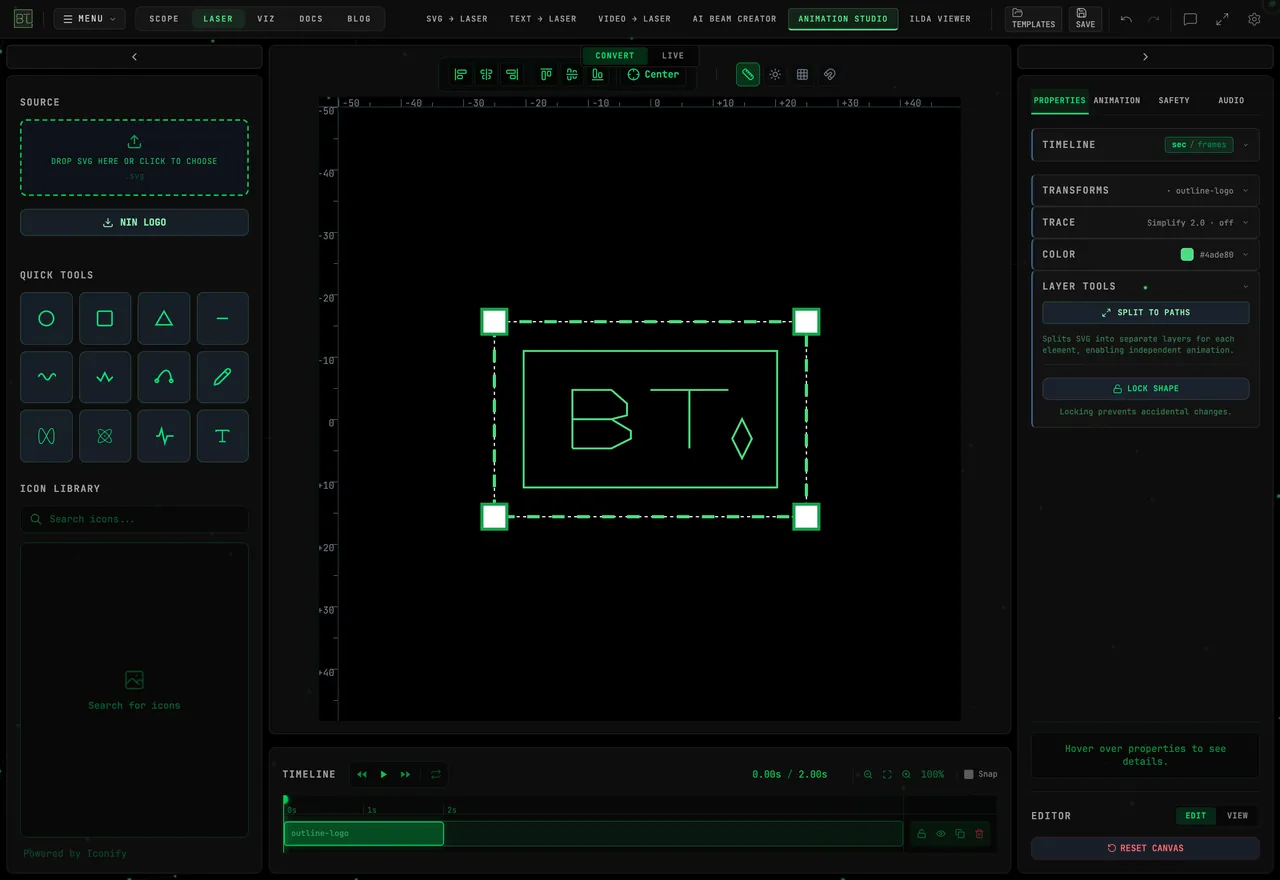
Step 1: Bring In the Logo
- Open Image to Laser and load your PNG or SVG logo (max 10 MB). For a bitmap, adjust IMAGE TRACE and its source colors first
- Check the conversion preview, then click Send to Animation Studio — the SVG source transfers as an editable layer
You can also drag the SVG straight onto the Animation Studio canvas.
Step 2: Split to Paths
- Select the logo layer
- In the Layer Tools, click Split to Paths
Each SVG path becomes its own layer — outline, letterforms, accents — independently selectable and animatable. Use an SVG with separate path elements; artwork stored as one path cannot be split this way.
Animation Studio holds 10 layers per session. When a logo has more paths than fit, Split to Paths gives the first paths a layer each and merges every remaining path into the last layer, and a note under Layer Tools says how many it merged. With nothing else in the session, that is paths 1–9 on their own layers and the rest in the tenth; the original layer is removed to make room, and undo brings it back. To choose which parts react on their own, simplify the logo first in a vector editor: combine the paths that should move together, so each part you want to animate is one path.
Step 3: Map Each Part to the Music
- Load your track under 1 SOURCE in the AUDIO tab (MP3, WAV, OGG, M4A)
- Under 3 MODULATION, click + ADD REACTION and set Drives to the path layer that should respond
- Build a different personality per part:
| Part | Source | Target | Min–Max | Feel |
|---|---|---|---|---|
| Outer outline | Bass | Scale | 1–1.15 | Pulses on the kick |
| Lettering | High | Opacity | 0.6–1 | Shimmers with hi-hats |
| Accent mark | Beat | Rotation | -10–10 | Twitches on every beat |
Tune Smoothing per row (low = snappy, high = flowing) and try the Exponential curve for punchier bass response.
The example uses Bass → Scale for the outline and High → Opacity for the lettering, with 30% Smoothing on both. Check Drives for each reaction: leaving it on All layers makes every part respond together.
Use your own multi-path artwork; the illustration shows a simple sample.
Step 4: Group What Belongs Together
If several paths should move as one (e.g., all the letters), select them and use Merge Layers to combine them into a single layer with one set of mappings. Use multi-select and the alignment toolbar to keep parts positioned relative to each other.
Step 5: Polish and Export
- Optionally add the Trace Reveal modifier to the merged lettering for an intro reveal
- Press Play and watch the whole logo react
- Check the Point Budget — logos with many paths can spike scanner load
- Click Download ILDA, then cue the fixed animation with the same uploaded track and trim during playback