
The Visualizer Layer
Choose any BeamTracer visualizer for your Studio canvas, apply presets, save your own, and place it over a photo or video backdrop with a transparent background.
The visualizer layer is the part of the frame that moves with the music. It uses the same visualizer and settings as the full Visualizers app, running inside your composition.
Most visualizers can also be rendered into a finished Studio video. If any visualizer in the composition is not available for offline rendering yet, the render dialog names it and disables RENDER VIDEO before the job starts. You can still preview that visualizer in Studio, or choose another one to finish the export.
Changing the visualizer
Select the visualizer layer, then click CHANGE at the top of its settings.
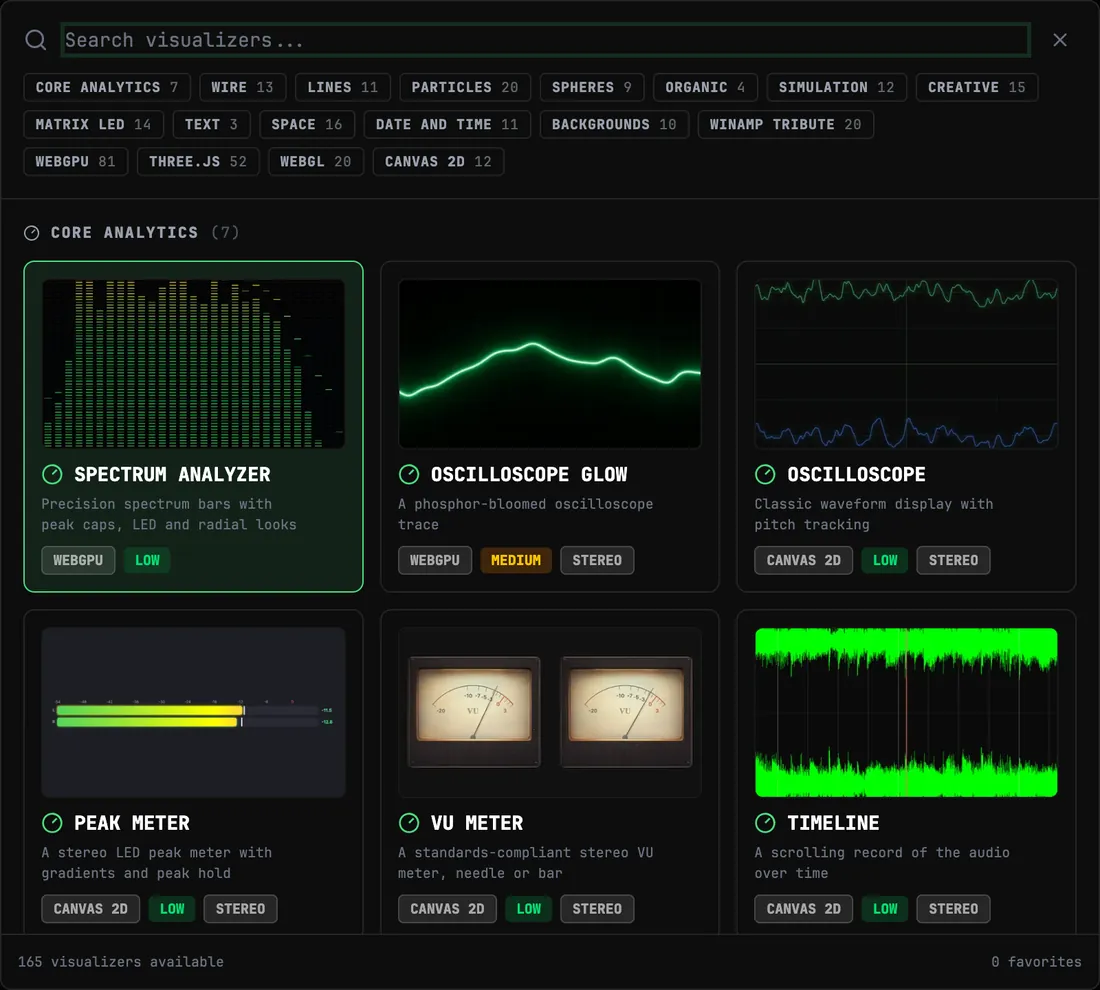
The picker is the whole catalog:
- Search by name.
- Category chips — narrow the catalog by the kind of visual you want.
- Engine chips — WebGPU, Three.js, WebGL, Canvas 2D. Each card also carries a performance hint (LOW / MEDIUM / HIGH) and a STEREO badge where the visualizer responds to a stereo image.
- The footer counts what is available and how many you have favorited.
Stepping through without opening the picker
Press [ and ] to move the selected visualizer layer to the previous or next entry in the catalog. It is the same pair of keys as the Visualizers app.
When the track is paused, a card on the preview names the current visualizer and offers ‹ › arrows that do the same thing — handy for auditioning looks with the mouse.
Visualizer settings
Below the picker, the rail carries that visualizer's own settings — the identical set the Visualizers app shows, including its presets, color palettes, band slicing, sensitivity, smoothing, and Reset to Defaults.
Every visualizer has its own guide with a complete settings reference. Find yours under Visualizers.
My presets
MY PRESETS · SAVE CURRENT stores the settings you have dialed in, so you can reuse a look across projects without rebuilding it.
Resetting a look
Use a section’s Reset button to restore its controls while keeping the rest of the look. Reset to Defaults restores the selected visualizer’s look and view, keeping uploaded artwork and entered text. Other layers and audio playback stay in place. Camera and motion resets also clear a dragged view.
Audioreactive Logo accepts PNG, JPG and SVG artwork in its LOGO control. The artwork stays with your saved project and appears in the rendered video.
Placing it in the frame
Use the layer controls to place the visualizer and adjust its background:
| Control | What it does |
|---|---|
| BACKGROUND OPACITY | Fades the visualizer’s background from its normal appearance to transparent |
| TRANSPARENT BACKGROUND | Some visualizers offer this switch instead of the opacity slider |
| POSITION X / Y | Move the visualizer inside the frame |
| SIZE | Scale it up or down |
| ROTATE | Turn it, in degrees |
| OPACITY | Blend it with what is underneath |
| LOCK LAYER | Hold it in place |
Compositing over a photo or video
Lower BACKGROUND OPACITY, or enable TRANSPARENT BACKGROUND where offered, to reveal the cover art or video beneath the visualizer. Check the preview while adjusting it; OPACITY fades the entire layer, including its subject.
More than one
You can add several visualizer layers. Give each a different size, position, and opacity — for example a large one filling the frame at low opacity plus a small, bright one in a corner. Every one reacts to the same audio source.
Next
Layers
The Studio layer stack — adding, selecting, moving, aligning, grouping, hiding, locking, and deleting the elements on your canvas.
Analysis, Playhead and Timer Layers
Put live analysis graphs, a progress playhead, or a running clock on the Studio canvas — the readouts that make a video feel like an instrument.