
Laser Blanking Explained: How to Fix Ghost Lines Between Letters
Ghost lines between laser letters — also called connecting lines or tails — are a laser
blanking problem: the beam stayed lit while moving between shapes. Open the
.ild file in the free BeamTracer ILDA Viewer and switch on SCANNER PATH. If the travel
is already dark there, the cause is color timing or point rate at the projector.
Hi, I'm Trina with BeamTracer.com — in this one I'll show you how to tell a bad file from a mistimed projector in about a minute, and what to change in each case.
A laser projector has one beam and two mirrors. To draw the word "AB" it draws the A, moves to the B, and draws the B — and the move in between is real travel across your wall. If the light is on during that move, you get a line joining the letters. Everything below is about keeping that one move dark.
The ILDA Viewer's GALVO SIMULATION, slowed right down so you can watch the single beam work. This copy of the file has its blanking removed: the beam stays lit as it crosses from the A to the B, and the crossing becomes part of the picture.
What is blanking in a laser show?
Blanking is switching the laser off while the scanner moves between separate shapes, so
the travel is invisible. In an ILDA file every point carries a blanking flag — bit 6 of the
point's status byte, where 1 means laser off. A blanked point still moves the mirrors; the
projector simply emits no light on the way there.
The same two letters as Text to Laser exported them, blanking intact, with SCANNER PATH on. The beam finishes the A, goes dark, and reappears at the B. The red marks show blanked travel: the mirrors still go there, with the light off.
You can read the flag directly. Switch on HEX VIEW under ADVANCED in the ILDA Viewer's settings, expand it, and each row after
the header is one eight-byte point: two bytes of X, two of Y, the status byte, then blue,
green and red. A status byte of 40 is bit 6 switched on — a blanked point. 00 is a lit
one.
In this file the first point is blanked, which moves the mirrors to the start of the A
with the light off. Six rows further down, the run of 40 rows that all share one
position is the beam waiting, dark, at the end of a stroke before it travels.
A clean move between two shapes usually looks like this inside the file:
| Order | What the file does | Why |
|---|---|---|
| 1 | Turns the beam off at the end of the first shape | The pen lifts |
| 2 | Repeats a blanked point at that end position | Gives the light time to finish switching off |
| 3 | Travels to the next shape with every point blanked | The move itself stays dark |
| 4 | Repeats a blanked point at the new start position | Gives the mirrors time to arrive and settle |
| 5 | Turns the beam on and starts drawing | The pen lands |
The bundled blanking test in the ILDA Viewer shows how much of a file this can be: of its 945 points, 405 are visible and 540 are blanked. More than half of that frame is travel nobody is meant to see. The byte-level detail is in Blanking Explained and the ILDA format reference.
Why does my laser draw lines between letters?
A laser draws lines between letters for one of three reasons: the ILDA file never blanked the travel, the projector's color switched later than its mirrors moved, or the file is playing at a different point rate than it was built for. The first is stored in the file. The other two only appear on real hardware, and the file itself is fine.
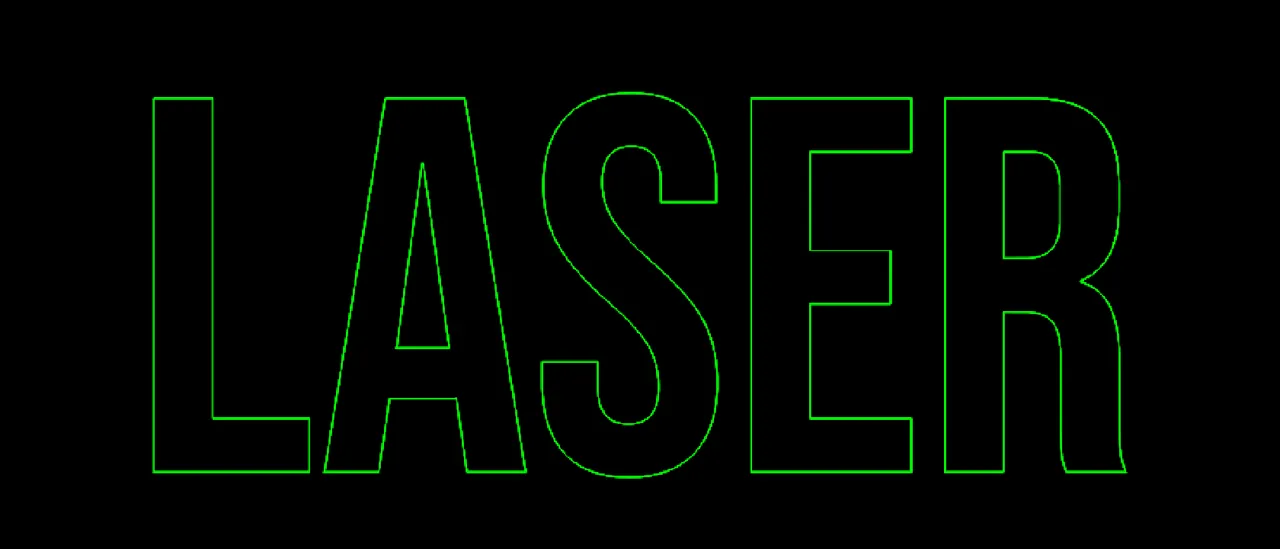
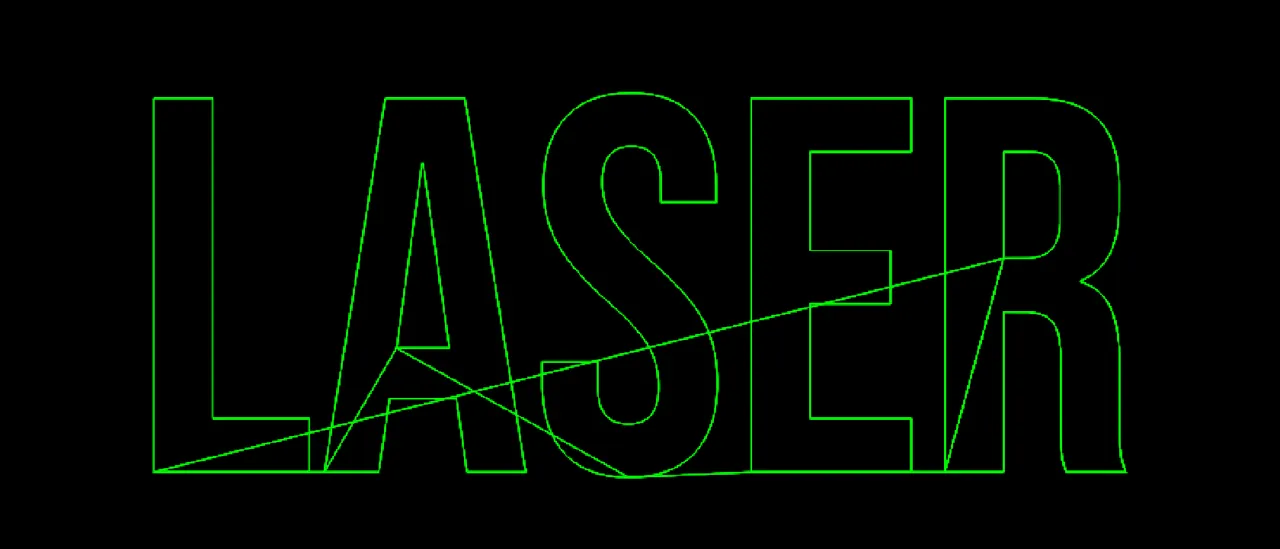 No blankingBlanked
| What you see on the wall | Likely cause | Where to fix it |
|---|---|---|
| Solid, full-brightness lines joining every shape | The travel points are lit in the ILDA file | Re-export the artwork with blanking |
| Faint, dim lines joining shapes | Color is still switching off as the mirrors start to move | Color delay on the projector output |
| The first part of each stroke is missing | Color arrives after the mirrors do | Color delay, in the other direction |
| Curved tails where a stroke begins | Too little settling time for the point rate in use | Match EXPORT RATE to your player's rate |
These symptoms can have other causes too, so treat the table as the order to check things in, and keep your projector manufacturer's setup guidance open beside it.
How do I check an ILDA file for blanking problems?
Load the .ild file into the ILDA Viewer and compare the plain preview
with the SCANNER PATH view. The plain preview draws only lit points, so a line between
letters there is stored in the file. SCANNER PATH adds every blanked move as a dashed
line, which shows you whether the travel was blanked at all and how far the scanner jumps.
- Open the ILDA Viewer in Chrome or Edge.
- Drop your file on CLICK OR DRAG ILDA FILE HERE, or click BLANKING under TEST SUITE to load a known-good reference first.
- Leave GALVO SIMULATION under ANALYSIS TOOLS in the PROPERTIES panel switched off, as it starts, so the whole frame holds still.
- Look at the preview: any line joining two letters now is lit inside the ILDA file.
- Switch on SCANNER PATH to draw every blanked move as a dashed line.
- Click the Settings gear, open ADVANCED, and switch on POINT DETAILS — the Viewer keeps its deeper tools off until you ask for them.
- Expand POINT DETAILS, choose FULL LIST, and click the Jump column to sort the longest moves to the top — each should read
BLKunder Type. - Click EXPORT ILDA to save a converted copy as ILDA Format 0, 1, 4 or 5, or switch on DOWNLOAD JSON under ADVANCED to keep the parsed point data.
The bundled blanking test with SCANNER PATH on. Every dashed line is a move the scanner really makes. Each one is a ghost line waiting to happen if the light is on for it.
POINT DETAILS is where a suspicion becomes a fact. Sorted by Jump, the longest
moves in the frame rise to the top, and the Type column says what each one is: BLK
for blanked travel, NRM for a normal lit point, ANC for an anchor point.
A long jump typed NRM is a lit line across your image, and that is a file problem. If
every long jump reads BLK, the file is doing its job and the lines you see are being
made later, at the projector. The footer totals visible and blank points for the frame.
Compare against a known-good file
Load BLANKING from TEST SUITE before your own file. Seeing what correct blanking looks like in SCANNER PATH makes a broken file obvious, and the same test file is a fair thing to play on your projector when you want to know whether the hardware is the problem.
How do I fix ghost lines that are stored in the ILDA file?
Re-export the artwork from a tool that blanks the travel for you. BT Laser Studio's creation tools add blanking between separate shapes and size the blanked settling for the point rate you choose, so the fix is to rebuild the file from its source — the text, the SVG or the image — instead of editing points by hand. For lettering, that is Text to Laser:
- Open Text to Laser in Chrome or Edge.
- Type your words into WORDS OR SYMBOL and pick a face from FONT LIBRARY.
- Expand ILDA OUTPUT and set EXPORT RATE to the point rate your ILDA player will run at.
- Check the traced letters on the canvas: separate letters should show no line joining them.
- Click DOWNLOAD ILDA to save the
.ildfile as ILDA Format 5 (2D True Color).
Two letters, one blanked move between them. EXPORT RATE sits directly above DOWNLOAD ILDA because the two belong together. OPEN IN ILDA VIEWER, below it, sends the same frame to the viewer so you can confirm the move with SCANNER PATH.
An ILDA file does not store its point rate
The settling time in a file is a number of points, and how long a point lasts depends on the rate it plays at. Build a file for 30 kpps, play it at a different rate, and the blanked pauses change length with it. Set EXPORT RATE to the rate you will actually use, and if you change rates later, export again.
For a logo or an SVG, use Image to Laser instead, where the device selector in POINT BUDGET sets the rate. The full walkthrough is in How to Convert SVG to ILDA.
How do I fix ghost lines that only appear on the projector?
Adjust Color delay. A projector's mirrors have mass and lag behind; its lasers switch almost instantly. When color switches off late relative to the mirrors, the tail of a stroke smears across the dark gap as a faint line. Color delay shifts color timing against scanner position until the two line up.
- Load your file in the ILDA Viewer, connect your DAC under LASER OUTPUT, and bring the projector up the way your safety procedure requires.
- Put a short word on the output — letterforms make a missing stroke start easy to spot.
- Open ADVANCED under LASER OUTPUT and find Color delay, which appears while a DAC is connected and starts at +120 µs.
- Change Color delay by one 10 µs step and compare the start and end of each stroke.
- Go back a step and try the other direction if the image gets worse; the control runs from −300 to +300 µs.
- Stop when the gaps between letters are dark. Nothing is exported here: your
.ildfile is unchanged, and BeamTracer remembers the value for that DAC in this browser.
Tuning means a live beam
Every step in this section happens with the laser emitting. Aim at a wall or screen, keep people out of the beam path, keep the projector's interlock within reach, and start at low power. If you have not set up a safe projection zone yet, read the laser show safety guide first.
Change one thing at a time. Point rate and color delay both move where a stroke starts and ends, so adjusting them together makes it hard to tell which one helped. If you play files from other show software or a standalone player, look for its own color or blanking timing setting and follow its guide; the principle is the same. The full explanation is in Color Delay Explained.
What is the difference between blanking and color delay?
Blanking is an instruction stored in the ILDA file: this point is dark. Color delay is a setting on the output side that decides when that instruction takes effect relative to the moving mirrors. A file can be blanked perfectly and still show faint joining lines if the timing is off. Other laser show software often calls the same setting color shift or blanking shift.
| Blanking | Color delay | |
|---|---|---|
| Lives in | The ILDA file, one flag per point | The output settings for your DAC and projector |
| Fixes | Solid lines joining shapes | Faint lines, dark stroke starts, tails |
| Check it with | SCANNER PATH and POINT DETAILS in the ILDA Viewer | A short word on the wall, one 10 µs step at a time |
| Travels with the file | Yes | No — it is remembered for the connected DAC |
Can I check blanking without a projector?
Yes. Everything in the file check above runs in the browser with no hardware: the plain preview, SCANNER PATH, POINT DETAILS, and STRESS HEAT MAP, which recolors the dashed travel by how far each jump is. Under LASER OUTPUT, the PREVIEW device draws the point stream a DAC would receive without connecting one.
For a moving picture, the 3D Beam Viewer has a Galvo beam mode with Mirrors on PHYSICS, which rounds corners and adds small entry tails after jumps the way a real scanner does. It is a simulation for comparing settings, not a prediction for your particular projector, and beam modes vary by plan — see Pricing.
How much blanking does an ILDA file need?
There is no fixed number. The useful count of repeated blanked points depends on the point rate, how quickly your projector's mirrors settle, and its color timing, so a file tuned on one rig can show tails on another. Two things are true everywhere, though:
- Blanked points are not free. The scanner outputs them like any other point, so they count toward the points per second your file demands. More blanking means cleaner gaps and a heavier frame.
- Long jumps deserve help. Drawing nearby shapes one after another shortens the travel, and intermediate blanked points along a long move turn one large jump into several small ones. The Optimization Guide covers both.
Is the ILDA Viewer free, and do I need to install anything?
The ILDA Viewer is free for everyone and needs no account. It runs in a browser tab, and your file is processed in the browser — nothing is uploaded. Use Chrome or Edge: BT Laser Studio is built and tested against them, and direct Helios output uses WebUSB, which only Chromium-based browsers implement. Ether Dream and LaserCube connect through the BeamTracer Bridge. Exports and hardware output depend on your plan; current plans are on Pricing.
Find out whether it's the file or the projector — free, no install
OPEN THE ILDA VIEWER →Next: How to Convert SVG to ILDA for logos and vector art, Best Beginner Laser Projector if you are still choosing hardware, and the Laser Show Safety Guide before any beam leaves the lens.
That's blanking. beamtracer.com — I'll see you in the next one.