
How to Add John Whitney-Inspired Animations to Your Music Video
To add John Whitney-inspired animation to your own music video, open BeamTracer Studio, load your song, change the visualizer layer to JOHN WHITNEY, choose a scene such as RING MASTER, put your footage behind it as a VIDEO BACKDROP, and click RENDER VIDEO to save an MP4. It runs in Chrome or Edge with nothing to install.
Hi, I'm Trina with BeamTracer.com. This is the whole job from an empty Studio to a saved file, with the real controls in the order you'll click them. If you'd rather start with the idea behind the animation, read the John Whitney-inspired visualizer introduction first and come back.
A short loop of the MP4 this walkthrough ends with: the RING MASTER scene over a video backdrop, an animated cyberpunk city street whose screens and signs move, rendered at 1920 × 1080 and 30 fps. The backdrop does not have to be a still image; Studio plays a video behind the dots. The dots are an independent BeamTracer visualizer, not footage from a John Whitney film.
How do you add a John Whitney-inspired visualizer to your own music?
In BeamTracer Studio, load your audio on the TRACK step, then open LOOK, select the visualizer layer, click CHANGE, and pick JOHN WHITNEY. The visualizer reacts to the song you loaded, and every control stays in the same settings rail.
- Open BeamTracer Studio in Chrome or Edge.
- On the 1 TRACK step, open AUDIO SOURCE and click UPLOAD YOUR OWN to choose your song. ORBITAL BLOB loads a sample track if you only want to try it.
- Click 2 LOOK, select the visualizer layer in the layers list on the left (it is SPECTRUM ANALYZER on a new project), and click CHANGE in the settings rail.
- Type
whitneyin the search box and choose JOHN WHITNEY. - Under SCENE, click RING MASTER. It fills the frame with concentric rings of dots.
Studio reads embedded cover art, title, artist and lyrics from the file's tags when it has them and fills the matching layers on the canvas. Press Space to play, and the preview moves with the music.
A John Whitney scene reads best with little else in the frame. The layers list on the left has an eye icon beside every layer, so you can hide ALBUM ART, ALBUM and LYRICS while you work, as this walkthrough does, and bring them back if the video needs them. The Studio getting-started guide covers the track step in more detail.
CHANGE opens the visualizer picker. Searching "whitney" leaves one card: JOHN WHITNEY.
Which John Whitney scene should you choose?
Choose RING MASTER when you want the visualizer to fill the whole frame: it draws concentric circles of dots that spread across the picture. Choose MUSIC BOX when you want a smaller ring of dots that keeps finding new alignments, which reads well beside a face or a title. The SCENE list has more to try as your video needs them.
The list includes MUSIC BOX, PERMUTATIONS (1968), CATALOG (1961), VERTIGO (1958), ARABESQUE (1975) and DANCING LINES, plus several more. COLOR MODE offers CHROMATIC, HARMONIC, MONO, VINTAGE and PHOSPHOR.
The color mode changes how the dots are tinted, so pick it against the backdrop rather than in isolation. The city street is mostly magenta, violet and cyan, and green is magenta's complementary color, so this walkthrough uses PHOSPHOR, which tints the dots green. The slider in the next section shows the difference.
Change the scene, let it run for a while, and only then change something else. The introduction shows what CATALOG, ARABESQUE and DANCING LINES look like and how each relates to a reel worth watching.
The full control list, including the DIFFERENTIAL DYNAMICS section with CYCLE DURATION and BASE SPEED, is in the John Whitney visualizer guide.
How do you put your own video behind the John Whitney visualizer?
Use the backdrop layer, and use a video rather than a still image when you want the picture behind the dots to move. Choose IMAGE/VIDEO, open BACKDROP SOURCE, and upload your clip under VIDEO BACKDROP. IMAGE BACKDROP takes a still, and AI BACKDROP makes one from a prompt; VIDEO BACKDROP is the one that plays footage. The visualizer's BACKGROUND OPACITY starts at 0%, so its own background stays clear and your footage shows through the dots. The clip in this walkthrough is a ten-second animated city street generated with an AI video tool, and any MP4 works the same way: footage you shot, a screen recording or an animated loop.
- Select the BACKDROP layer in the layers list.
- Choose the IMAGE/VIDEO tab and open BACKDROP SOURCE.
- Open VIDEO BACKDROP and click UPLOAD VIDEO, then pick your clip. The WORKOUT SAMPLE button loads a short sample if you want to try the layout first.
- Open BACKDROP SETTINGS → VIDEO LOOP and choose what happens when the clip ends.
- Select the visualizer layer and raise SIZE until the dots fill the frame. Press Space to watch them over the footage.
The panel names the clip you loaded and its length, so you can confirm you picked the right file before you edit anything. REPLACE VIDEO swaps in a different clip.
If your clip has no soundtrack, Studio tells you so with This file has no audio we can export. That is fine here: the song you loaded on TRACK supplies the sound. A clip that does have its own sound adds MUSIC, VIDEO and MIX buttons to the transport, so you can choose between your song, the clip's audio or both.
If the clip is shorter than your song, ONCE holds the last frame, FROM START restarts the clip, and REVERSE plays it back toward the opening frame and then forward again. REVERSE hides the join best on a clip that does not loop by itself, which is why this walkthrough uses it. If the clip has its own soundtrack, leave the transport on MUSIC so your song stays continuous while the backdrop loops.
Upload MP4 / H.264, not WebM
The panel says it plainly: MP4 / H.264 for export. WebM previews only. A WebM clip plays in the editor but does not appear in the rendered file, so convert it to MP4 before you upload.
How do you make the dots easy to see over your footage?
Match the dots to the picture. Drag the divider to compare the visualizer's default SIZE with the maximum on the same frame of the same render: at 1.00× the rings sit in the middle of the street, and at 2.00× they spread across it.
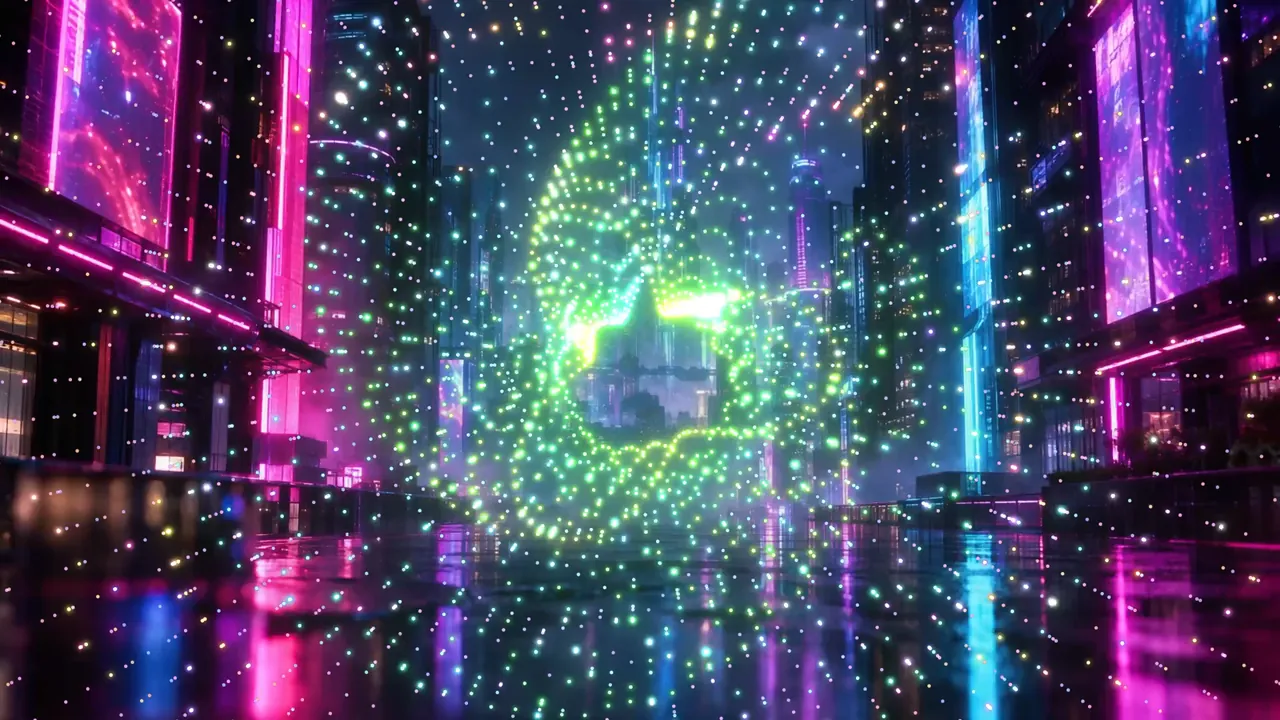
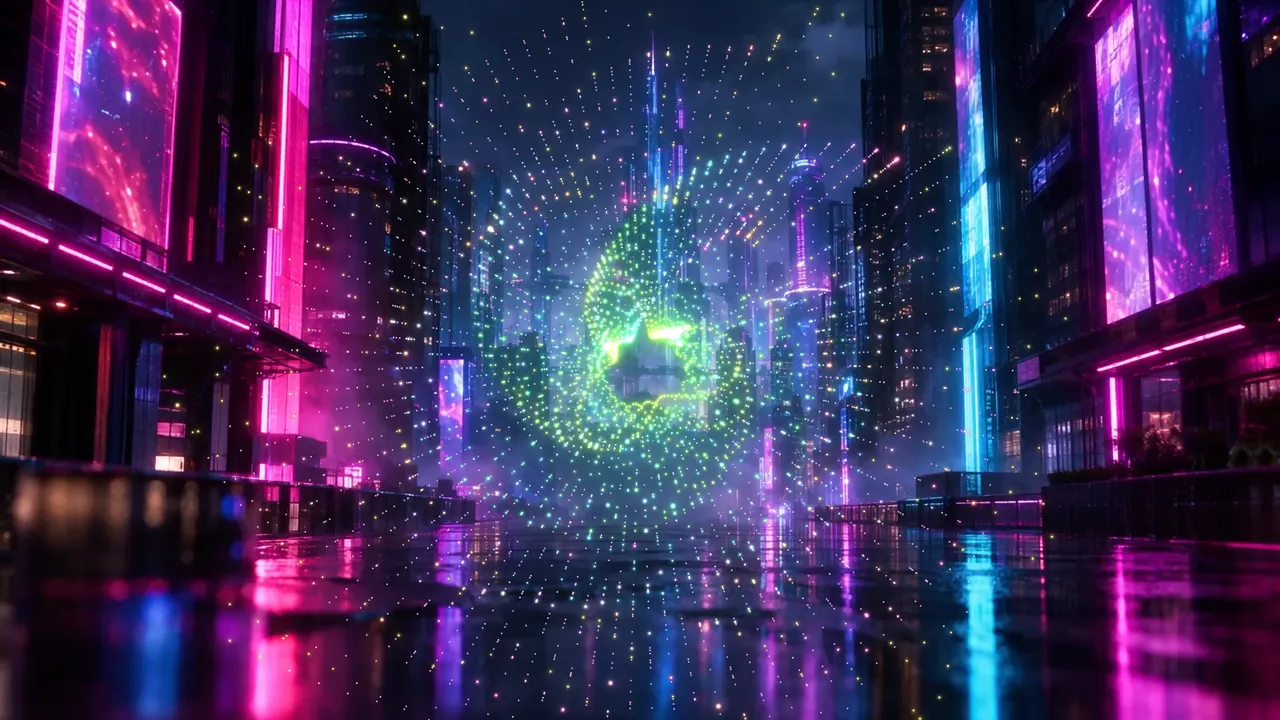 SIZE 1.00×SIZE 2.00×
SIZE sits at the top of the visualizer's settings. If the dots disappear into a bright backdrop, also raise POINT SIZE in the DISPLAY section and STRENGTH in the BLOOM section until the pattern reads clearly. A dark, busy backdrop like the city street shows the default dots well.
Color matters as much as size. Pick the COLOR MODE that sits opposite the backdrop's dominant color on the color wheel. The street is mostly magenta, violet and cyan, so PHOSPHOR (green) stands out. Drag the divider to compare the default CHROMATIC mode with PHOSPHOR on the same frame.
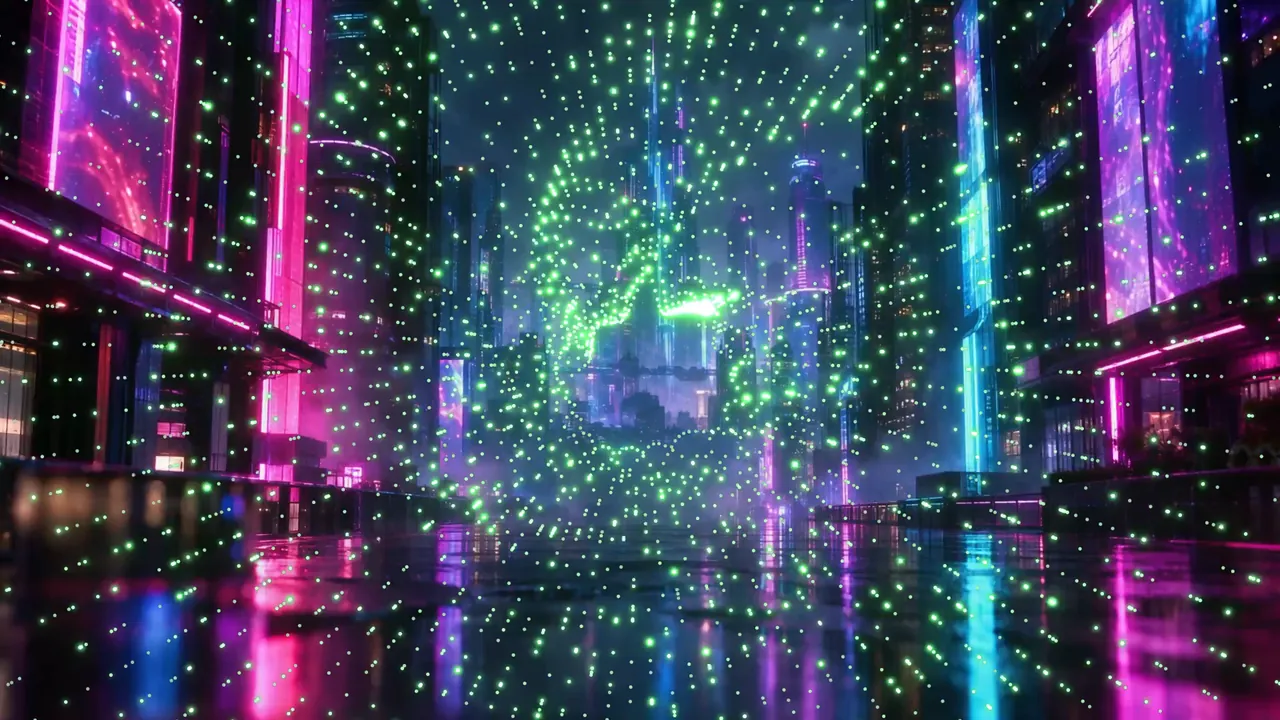 CHROMATICPHOSPHOR
For the loop at the top of this page, SIZE is at its maximum of 2.0× and COLOR MODE is PHOSPHOR; every other setting is the default. Check the pattern at a few points in the song before you export, because the visualizer responds to the music and the same scene can look different from one passage to the next.
How do you export the finished music video?
Pick the platform on FRAME, check the summary on EXPORT, then click RENDER VIDEO and SAVE VIDEO. Studio draws every frame itself and writes an MP4 to your device. Your track and footage are not uploaded for the render.
- Click 4 FRAME and choose YOUTUBE for a 16:9 video, or SHORTS · REELS · TIKTOK for a vertical one.
- To export only part of the song, open ADVANCED and use TRIM FOR EXPORT, or click LOUDEST 15S to pick the loudest fifteen seconds.
- Click 5 EXPORT and read the summary. It should list VISUALIZER as JOHN WHITNEY and your video under BACKDROP.
- Click RENDER VIDEO, then choose the PLATFORM, RESOLUTION, FRAME RATE and FORMAT. MP4 · H.264 plays almost everywhere.
- Click RENDER VIDEO in the dialog. When VIDEO READY appears, click SAVE VIDEO to download the MP4.
The green box on the waveform at the bottom of Studio shows the slice that exports; drag it to move the cut. Skip this step to render the whole song.
The ASPECT list above it sets the shape of the frame: 16:9 for YOUTUBE, 9:16 for TIKTOK · SHORTS · REELS, 1:1 for INSTAGRAM, 4:5 for IG FEED and CANVAS for SPOTIFY. Under PREPARE FOR SOCIAL MEDIA CLIP, TRIM FOR EXPORT is a slider that sets how long the clip is, and LOUDEST drops the green box on the loudest fifteen seconds of the song, which is a good short clip to post. Pick the shape first: a vertical frame crops a wide backdrop, so check the preview before you render.
The summary lists the frame, the file type, the length, the audio source and every layer that will appear, so a wrong backdrop shows up here instead of after a render.
Read it row by row. PLATFORM, FRAME and RATE confirm the shape and size. FILE names the container and codec, LENGTH shows the slice you trimmed, and AUDIO names the track that will be heard. LOUDNESS shows the normalization target and AUDIO TRIMMED tells you whether a slice is set. The last rows, VISUALIZER, BACKDROP, TITLE, ARTIST and LYRICS, show what will appear in the picture; the backdrop row shows your video's file name, here CYBERPUNK-CITY. It takes ten seconds and is faster than re-rendering.
Set PLATFORM, ASPECT RATIO, RESOLUTION, FRAME RATE and FORMAT, then check the footer. It states the frame, the size and the exact frame count you are about to render. AUDIO RANGE shows the trimmed slice, and INCLUDE AUDIO keeps your song in the file.
RESOLUTION offers 1080P and 4K, and FRAME RATE offers 24, 25, 30, 48 and 60. FORMAT is MP4 · H.264 or WEBM · VP9; pick MP4 for an upload to YouTube or social. FILE NAME is the name of the download, and the checkbox beside it adds the frame rate, resolution and aspect ratio to the name if you render the same project several ways. Click QUICK PREVIEW instead of RENDER VIDEO to get a small watermarked MP4 first: it renders at 640 pixels and 24 fps and does not use your monthly export allowance.
VIDEO READY. SAVE VIDEO downloads the file.
Play the saved file before you publish it. Check that the footage appears behind the dots, that the dots stay visible through the whole slice, and that the soundtrack is the one you chose. The Studio export guide explains every dialog setting.
Is it free, and do you need to install anything?
Studio runs in Chrome or Edge with nothing to install, and building and previewing cost nothing. Your first video export needs no account. A free account gets ten finished exports each calendar month, and free exports carry the BeamTracer watermark. 4K and unlimited exports depend on your plan; see pricing.
Use music and footage you have permission to publish.
Is this John Whitney's actual film footage?
No. JOHN WHITNEY is an independent, interactive visualizer inspired by his visual music, and MUSIC BOX follows the dot-and-harmonic-cycle idea popularized by Jim Bumgardner's Whitney Music Box. BeamTracer does not supply Whitney's films, soundtracks or original software. For the history, which reels to watch and what he said about composing motion, read the introduction.
To see how the real thing moves, here is Catalog, one of Whitney's films, from YouTube. Watch a passage for its spacing and pace before you pick a scene and a color of your own.
Where to go next
- The John Whitney-inspired visualizer introduction covers the films and the scenes.
- The JOHN WHITNEY visualizer guide lists every control.
- The Studio visualizer layer explains placing and fading any visualizer over a backdrop.
- Can you turn geometric animation into laser graphics? takes the same kind of motion to a laser.
Put the pattern behind your song
Load a track, switch the visualizer to JOHN WHITNEY, and render your first MP4.
Open BeamTracer Studio →